
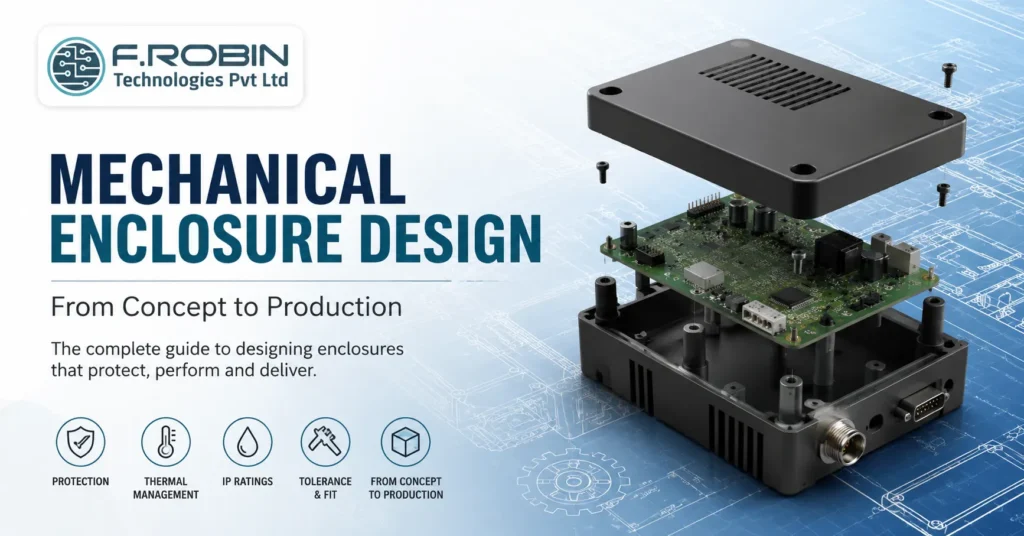
Mechanical enclosure design is the process of creating the protective housing that holds and shields your electronics from first sketch to production-ready tooling. A good enclosure does far more than look tidy: it protects the board, manages heat, resists the environment, and shapes how users interact with the product. Get it wrong, and you risk failures, rework, and costly tooling changes.
This guide walks through electronic enclosure design from concept to production, stage by stage. You will learn how requirements turn into 3D CAD, how to choose materials, how tolerance and ingress protection shape the design, and how a concept becomes a manufacturable housing. Whether you are building a rugged industrial unit or a sleek consumer device, the path is the same.
What Is Mechanical Enclosure Design?
Mechanical enclosure design is the engineering of a physical housing that protects and packages electronic hardware. It covers the enclosure’s shape, material, fit, fastening, sealing, and thermal behaviour everything that keeps the electronics safe and usable.
The discipline blends form and function. On one hand, the enclosure must protect the board from dust, moisture, shock, and heat. On the other, it must be manufacturable, serviceable, and pleasant to use. Because it touches mechanical, thermal, and industrial design at once, enclosure design is a true cross-disciplinary task.
It also works hand in hand with the electronics inside. The board outline, connector positions, and mounting points all influence the housing, so good electronic enclosure design starts with the PCB and the enclosure considered together never in isolation.
Why Mechanical Enclosure Design Matters
A well-designed enclosure protects your investment and your users. Skimp on it, and even a brilliant board can fail in the field. Strong mechanical enclosure design delivers several benefits:
- Protection from dust, water, shock, and vibration.
- Thermal management, keeping components within safe temperatures.
- Compliance with safety, EMC, and ingress standards.
- Usability, with sensible access to ports, buttons, and displays.
- Brand and perception, since the enclosure is what users see and touch.
The cost of getting it wrong is high. Late enclosure changes after tooling are slow and expensive, and a poor seal or weak mount can cause field returns. Therefore, investing in mechanical enclosure design early protects both reliability and budget.
The Mechanical Enclosure Design Process: Concept to Production
Here is how concept-to-production design unfolds, stage by stage. Each step builds on the last.
Step 1: Requirements and Specification
Start by capturing requirements: size limits, environment, IP rating, thermal load, mounting, ports, certifications, and volume. A clear spec anchors every later decision and prevents costly surprises.
Step 2: Concept Design
Next, explore concepts. Sketches and rough 3D models test different forms, layouts, and split lines. This is the cheapest stage to experiment, so explore several directions before committing.
Step 3: Detailed 3D CAD
Now build the detailed model. Engineers create the enclosure in 3D CAD commonly SolidWorks defining walls, bosses, ribs, and features precisely. The PCB model is imported so the housing fits the board exactly.
Step 4: Material Selection
With the form set, choose the material. Material selection balances strength, cost, weight, thermal needs, and looks. We cover the main options below.
Step 5: Tolerance and DFM
Then refine for manufacturing. Tolerance analysis ensures parts fit reliably, while design for manufacturability (DFM) tunes features for the chosen process moulding, sheet metal, or machining.
Step 6: Prototyping and Validation
Build prototypes — often 3D printed or machined — and test fit, function, thermal, and ingress. Validation here catches issues while changes are still cheap, before tooling.
Step 7: Production and Tooling
Finally, commit to production. Tooling (such as injection moulds) is cut, first articles are inspected, and volume manufacturing begins. A clean handoff here turns your design into real, repeatable parts.
Material Selection for Enclosures
Material drives cost, durability, and process. The table compares common enclosure materials.
| Material | Strengths | Best For |
|---|---|---|
| Injection-moulded Plastic | Low unit cost at volume, excellent design freedom | Consumer and high-volume products |
| Sheet Metal | Strong, good for shielding, low tooling cost | Industrial and low-to-mid volume products |
| Die-cast Aluminium | Rugged, excellent thermal and EMI shielding | Rugged, high-reliability units |
| Aluminium Extrusion | Cost-effective for long, simple shapes | Rack units, amplifiers, and instruments |
There is no single best material — the right choice depends on volume, environment, and budget. For high-power products, thermal performance often drives the decision; for consumer goods, cost and finish lead.
Ingress Protection (IP Ratings)
Ingress protection defines how well an enclosure keeps out dust and water, expressed as an IP rating (for example, IP65). The first digit rates solids, the second rates liquids. Choosing the right rating early shapes seals, gaskets, and joints throughout the design.
Common targets include:
- IP54 — limited dust and splash protection for indoor use.
- IP65 — dust-tight and protected against water jets.
- IP67 — dust-tight and protected against temporary immersion.
Over-specifying ingress protection adds cost and complexity, while under-specifying risks failure. Match the IP rating to the real operating environment, and design seals and gaskets to achieve it from the start — retrofitting sealing later is difficult and unreliable.
Tolerance and Fit
Tolerance is where good mechanical enclosure design succeeds or fails. Parts must fit together, align with the PCB, and accommodate manufacturing variation all at once. Loose tolerances cause rattles and gaps; overly tight tolerances raise cost without benefit.
A tolerance stack-up analysis checks that the accumulated variation across mating parts still produces a reliable fit. It is especially important where the enclosure meets connectors, buttons, and the board, since misalignment here is highly visible to users.
The goal is balance: specify tolerances tight enough to work, but loose enough to manufacture affordably. Coordinating closely with the PCB through solid PCB layout design services — keeps connector and mount positions aligned with the housing.
Mechanical Enclosure Design and the PCB
The single biggest predictor of enclosure success is how early it is coordinated with the board. Mechanical enclosure design and PCB layout should advance together, sharing the same 3D model so connectors, mounting holes, and tall components never clash with the housing.
When the two teams work in sync, problems surface on screen instead of on the bench. Connector cut-outs line up, standoffs land on real pads, and tall capacitors clear the lid. When they work in isolation, the first prototype reveals expensive surprises. A shared 3D CAD workflow exporting the PCB into the enclosure model turns mechanical enclosure design from a guessing game into a precise, predictable process. This is why experienced teams kick off mechanical enclosure design at the same time as schematic capture, not after the board is frozen.
Common Mistakes to Avoid
Even experienced teams stumble on mechanical enclosure design. Watch for these:
- Designing the enclosure after the PCB is final, instead of together.
- Ignoring tolerance stack-up, leading to parts that do not fit.
- Over- or under-specifying the IP rating for the environment.
- Forgetting thermal paths, so the enclosure traps heat.
- Leaving DFM too late, forcing expensive redesigns before tooling.
- Skipping prototypes, so fit and sealing problems appear only in production.
Avoiding these keeps your concept-to-production design smooth, affordable, and on schedule.
Key Takeaways
- Mechanical enclosure design creates the housing that protects, cools, and packages electronics.
- The process runs concept to production: requirements, concept, 3D CAD, materials, tolerance/DFM, prototyping, tooling.
- Material selection balances cost, strength, thermal needs, and finish.
- Choose the IP rating to match the real environment, and design seals from the start.
- Tolerance stack-up ensures reliable fit between the enclosure, PCB, and connectors.
- Design the enclosure and PCB together, and prototype before tooling.
Conclusion
Mechanical enclosure design takes a product from concept to production through a clear path: capture requirements, explore concepts, build detailed 3D CAD, select materials, refine tolerance and DFM, prototype, and tool for volume. The keys to success are designing the enclosure and PCB together, matching ingress protection to the environment, and validating before tooling.
Turn Your Product Idea into Reality
Bringing a product from idea to production? Our mechanical engineering services cover enclosure design, 3D CAD modeling, and concept-to-production development for rugged industrial systems and consumer electronics alike.
Talk to Our Engineering TeamFrequently Asked Questions
1. What is mechanical enclosure design?
Mechanical enclosure design is the engineering of a physical housing that protects and packages electronic hardware, covering shape, material, fit, sealing, fastening, and thermal behaviour from concept to production.
2. What are the steps in electronic enclosure design?
The steps are requirements and specification, concept design, detailed 3D CAD, material selection, tolerance and DFM, prototyping and validation, and production tooling.
3. What software is used for mechanical enclosure design?
Engineers commonly use 3D CAD tools such as SolidWorks, along with Creo, CATIA, or Siemens NX, to model the enclosure and fit it precisely to the PCB.
4. How do I choose a material for an enclosure?
Material selection balances cost, strength, weight, thermal needs, and finish. Injection-moulded plastic suits high volume, sheet metal suits industrial units, and die-cast aluminium suits rugged, thermally demanding products.
5. What is an IP rating in enclosure design?
An IP rating defines ingress protection — how well the enclosure resists dust and water. For example, IP65 is dust-tight and protected against water jets. Match the rating to the real environment.
